Access guide
Here we gather a collection of how-to notes with the aim of helping users to self-manage their virtual machines.
SSH access
SSH access into virtual machines is only allowed via public-key authentication.
Create your own public SSH key
For general information about how SSH authentication works, please visit:
If you have already created a public SSH key on your computer, it should be available in:
# list your SSH keys
ls -al $HOME/.ssh
If the command above works, you just need to check whether your SSH key is loaded with:
# check whether your SSH keys are loaded
ssh-add -L
That should print out all the SSH public keys that are already loaded in you terminal so just pick one to configure your SSH access to the virtual machine.
If the ssh-add -L command did not return any output, please execute ssh-add or
ssh-add ./path/to/private/key/ to load it. More information
here.
Please note that both private and public SSH keys are located in the $HOME/.ssh folder.
Public keys are usually stored in files ending with the .pub extension. If you have one,
you can either email it to us via ska-itsupport 'at' iaa.csic.es or follow steps in the next
section to configure SSH access yourself via Guacamole.
Warning
Please make sure you only share public SSH (files ending in .pub) with others.
If the ls -al $HOME/.ssh command above fails, it is very likely that you haven not configured
SSH keys yet. To do so please use the ssh-keygen command:
# create a new SSH key pair
ssh-keygen
Follow instructions on your terminal and for more information please visit:
https://www.ssh.com/ssh/keygen/
If all went well you should have a new file ending in .pubunder the $HOME/.ssh folder.
Then, feel free to email us a copy of your .pub file to ska-itsupport 'at' iaa.csic.es
so we configure your SSH access or follow steps in the next section if you have access to Guacamole.
Add your public SSH key to access your virtual machine
If you have access to the virtual machine via Guacamole then you can add your public SSH key to your account yourself. Please open a terminal and try these steps:
# go to your home folder
cd

# create an .ssh folder if it doesn't exist
mkdir -p .ssh

# configure permissions
chmod 0700 -R .ssh

# now cd into the .ssh folder
cd .ssh

# create an authorized file and add your public SSH key
vi authorized_keys

# configure permissions
chmod 0600 authorized_keys
You should now be able to login with your SSH keypair. If you have problems, please send your
public key to ska-itsupport 'at' iaa.csic.es and we will configure SSH access for you.
Windows Users
This page is about PuTTYgen on Windows. For the Linux version, see here.
PuTTYgen is an key generator tool for creating SSH keys for PuTTY. It is analogous to the ssh-keygen tool used in some other SSH implementations.
The basic function is to create public and private key pairs. PuTTY stores keys in its own format in .ppk files. However, the tool can also convert keys to and from other formats.
Go to Windows Start menu → All Programs → PuTTY → PuTTYgen.
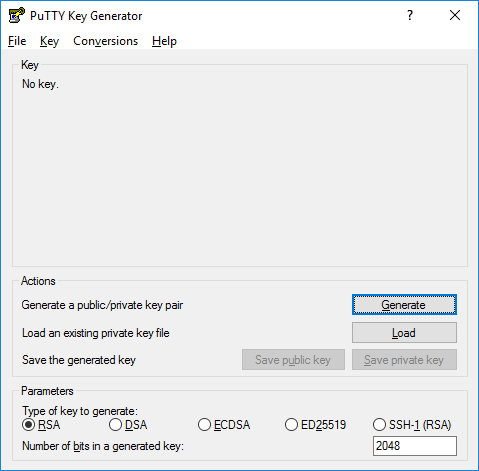
Then click Generate, and start moving the mouse within the Window. Putty uses mouse movements to collect randomness. The exact way you are going to move your mouse cannot be predicted by an external attacker. You may need to move the mouse for some time, depending on the size of your key. As you move it, the green progress bar should advance.
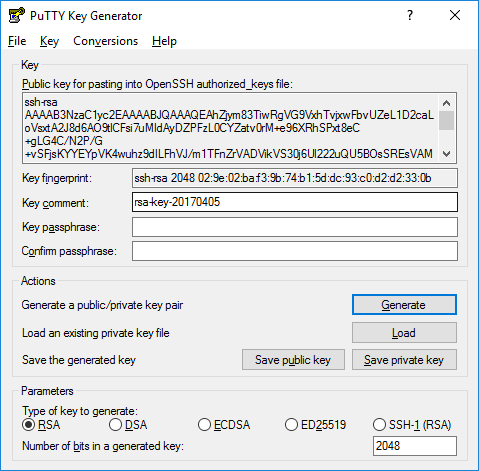
Once the progress bar becomes full, the actual key generation computation takes place. This may take from several seconds to several minutes. When complete, the public key should appear in the Window. You can now specify a passphrase for the key.
You should save at least the private key by clicking Save private key. It may be advisable to also save the public key, though it can be later regenerated by loading the private key (by clicking Load).
Connecting to your vm with the private key
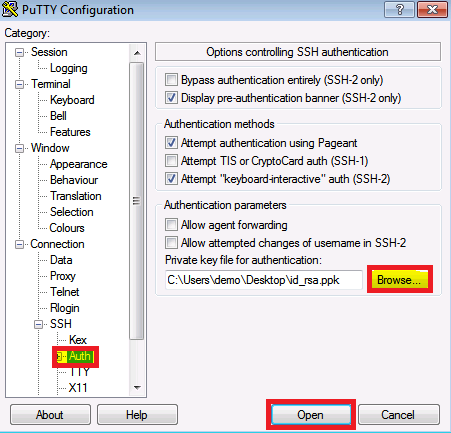
Enter the remote server's hostname or IP address and port.
Go to Connection -> SSH -> Auth. Click Browse... under Authentication parameters -> Private key file for authentication. Locate the id_rsa.ppk file on your local machine and go to Open.
Finally, click Open to log in to the remote server with key pair authentication.
Remote desktop
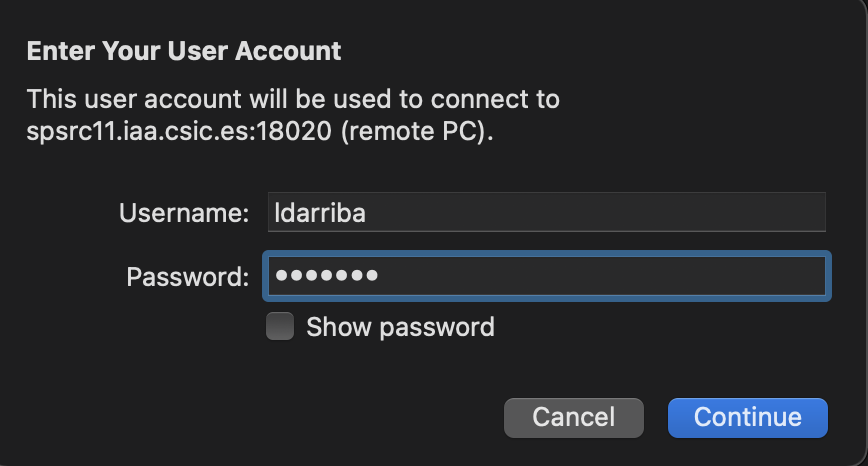
It is possible to access to you virtual machine through a remote desktop.
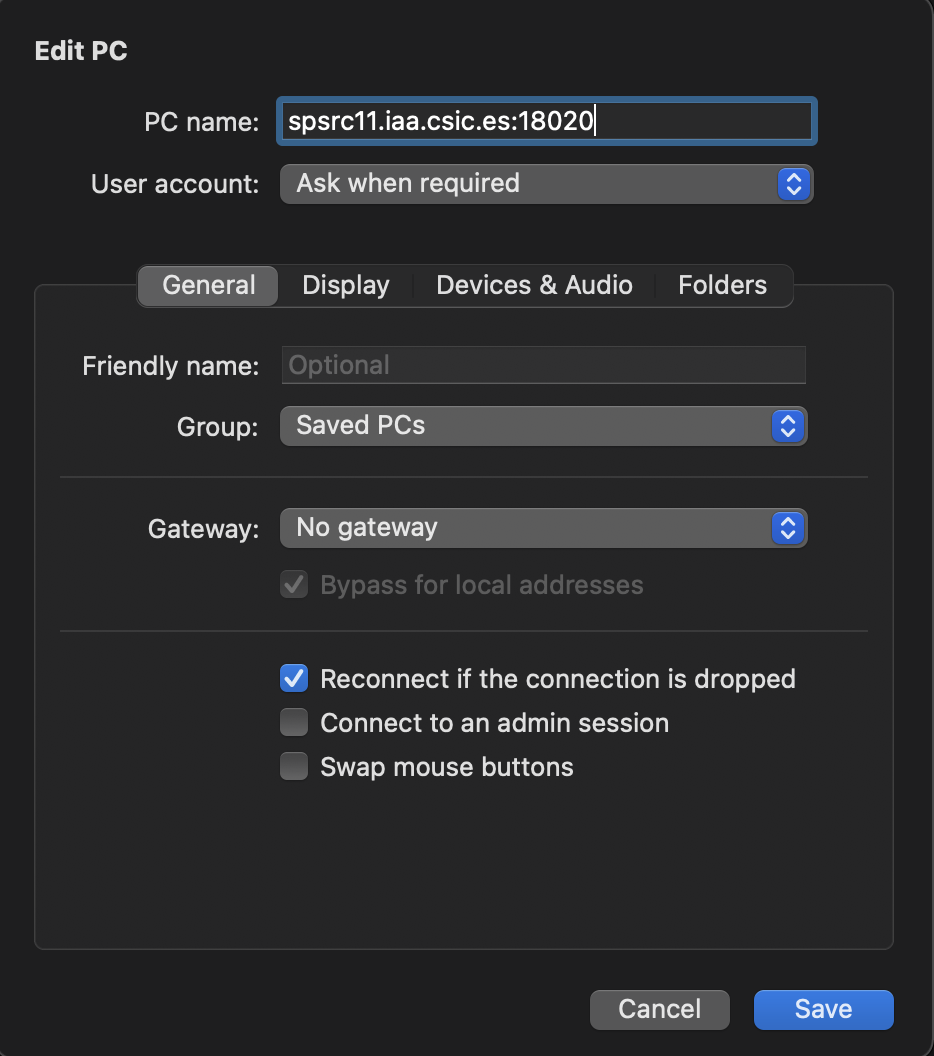
- Install an RDP client on your computer. If you use Mac you can download Microsoft Remote Desktop, for Linux, you can use Remmina
-
Indicate in Host/Server and port 18020
-
You can add your Linux credentials to the connection configuration. If you leave them empty, you will be requested to enter them when you start the connection
Web-based remote desktop
When a project requires access to a remote desktop we preconfigure virtual machines with Apache Guacamole.
Working with the clipboard in Guacamole
Using the clipboard in Guacamole is not intuitive. If you are planning to use the clipboard a lot, and the information you are going to work with is available online (i.e. via a web browser), we then recommend you to open firefox to copy/paste as usual inside the virtual machine.
If, on the other hand, you need to copy/paste between your workstation and the virtual machine, then you will have to use the Guacamole menu. On the tab where you have Guacamole working, press Ctrl+Alt+Shift and the menu appears on the left:
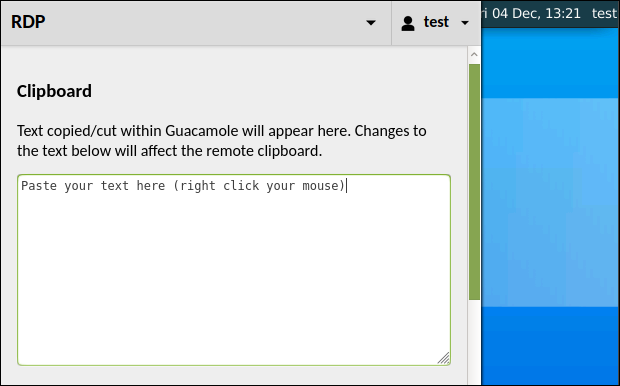
You will see the Guacamole clipboard that will be used as an intermediate buffer between your workstation and the virtual machine:
-
Copy/paste from your workstation to the virtual machine: 1) first copy the text into the clipboard as usual in your workstation; 2) open the Guacamole menu with Ctrl+Alt+Shift and paste your text into the Guacamole clipboard; 3) the text is now available inside the virtual machine clipboard and you can paste it as expected with Ctrl+V
-
Copy/paste from the virtual machine to your workstation: 1) use Ctrl+C inside the virtual machine to copy text as usual; 2) open the Guacamole menu with Ctrl+Alt+Shift and copied text automatically appears in the Guacamole clipboard; 3) you can now copy from there into your workstation's clipboard.
How to change your password in Guacamole
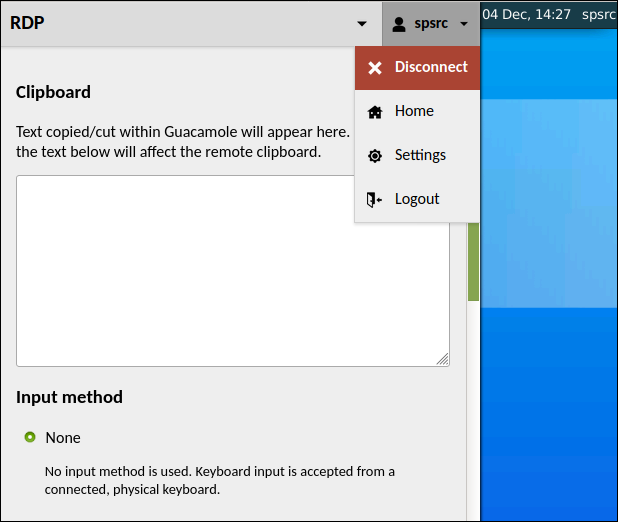
Press Ctrl+Alt+Shift to open the Guacamole menu, first click on your username (spsrc on the example image) and then on Settings:
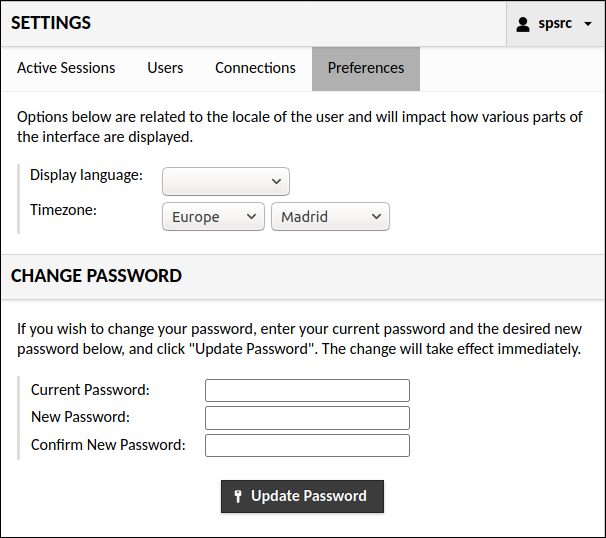
Then go to Preferences and follow instructions to change your password:
How to add a new user in Guacamole
Go to the menu on the top-right and click on Settings:
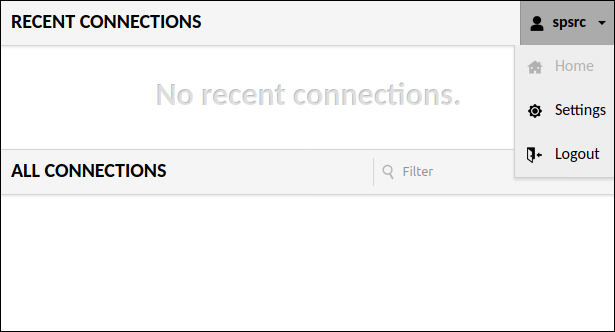
Then go to Users and click on New User:
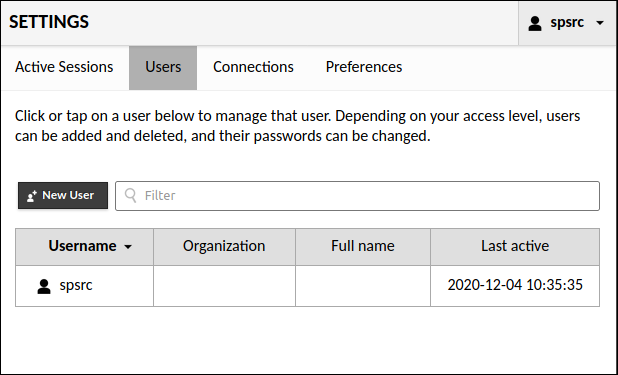
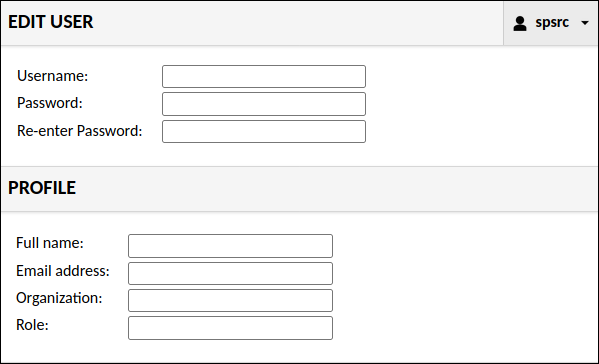
Enter a username and password for the new user:
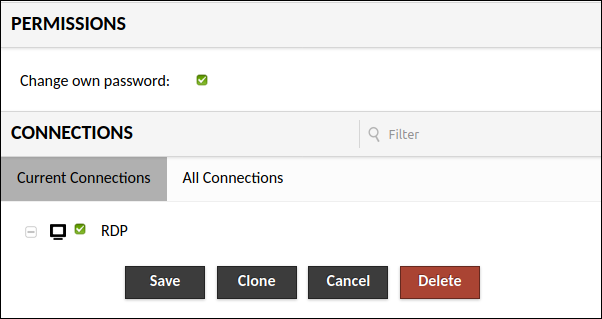
Scroll down and check the following and click on Save:
- Permissions/Change own password
- Connections/RDP
How to change your locale in Guacamole
Depending on your system's locale you may find issues while typing text inside the virtual machine via Guacamole. Check whether you have the correct configuration in Guacamole by following the steps below.
Go to the menu on the top-right and click on Settings:
Then go to Connections and click on RDP:
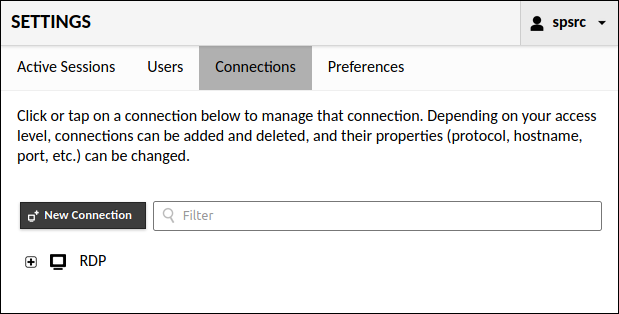
Now look for the Basic Settings section and choose the correct keyboard layout:
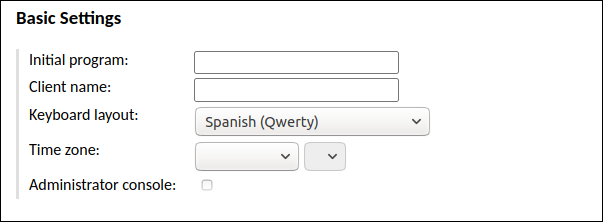
Do not forget to scroll down and click on Save.
User management with Linux
By default, when a VM is created we will create an account for the PI of the project.
The Ip account will have restricted sudo access and can choose to create new accounts for their collaborators.
All users created will be by default in group spsrc-users without sudo access.
Change your default password
Run the following command on a terminal and follow instructions:
passwd
Create a user account
Open a terminal and run the following commands. When you enter the openssl command below, you have to enter twice the password for the new user. The hash code will only be used in the useradd command, and you don't need to keep it.
# Generate a new hash (enter the password for the future new user):
openssl passwd

# Create a new account:
sudo useradd --password "<output-from-previous-command>" --gid spsrc-users --create-home --shell /bin/bash <collaborator>
For example, imagine you want to create the user john with password acomlpicatedpass. You can do:
openssl passwd
Password:                 <--- write acomplicatedpass
Verifying - Password:     <--- write acomplicatedpass
7TRPLSzGYvTf4             <--- you will get a hash code similar to this one
sudo useradd --password 7TRPLSzGYvTf4 --gid spsrc-users --create-home --shell /bin/bash john
Limited root access for a user account
If the PI want to give a user the same level of sudo access, you need to add the user to the spsrc-group group
# add user to spsrc-group
sudo usermod -a -G spsrc-group <collaborator>

# add user to spsrc-group
sudo usermod -a -G spsrc-group john
After this the user must restart sesion in the VM
Delete a user account
You can delete a user account using the userdel command:
sudo userdel <collaborator> --remove
For example:
sudo userdel john --remove
Data transfer
We suggest using FileZilla to transfer data in and out of the virtual machine.
Transfers will only be possible via public SSH authentication. Here are instructions on how to configure FileZilla to work with SSH keys:
https://wiki.filezilla-project.org/Howto
Please send your public SSH key to ska-itsupport 'at' iaa.csic.es so we can configure it for you.